|
|
||
|---|---|---|
| .github/workflows | ||
| CMakeModules | ||
| android | ||
| appimage | ||
| data/inputprofiles | ||
| dep | ||
| src | ||
| .clang-format | ||
| .gitattributes | ||
| .gitignore | ||
| .gitmodules | ||
| CMakeLists.txt | ||
| CMakeSettings.json | ||
| LICENSE | ||
| README.md | ||
| appveyor.yml | ||
| duckstation.sln | ||
README.md
DuckStation - PlayStation 1, aka. PSX Emulator
Discord Server: https://discord.gg/Buktv3t
Latest Windows and Linux (AppImage) Builds: https://ci.appveyor.com/project/stenzek/duckstation
DuckStation is an simulator/emulator of the Sony PlayStation(TM) console, focusing on playability, speed, and long-term maintainability. Accuracy is not the main focus of the emulator, but the goal is to be as accurate as possible while maintaining performance suitable for low-end devices. "Hack" options are discouraged, the default configuration should support all playable games with only some of the enhancements having compatibility issues.
A "BIOS" ROM image is required to to start the emulator and to play games. You can use an image from any hardware version or region, although mismatching game regions and BIOS regions may have compatibility issues. A ROM image is not provided with the emulator for legal reasons, you should dump this from your own console using Caetla or other means.
Features
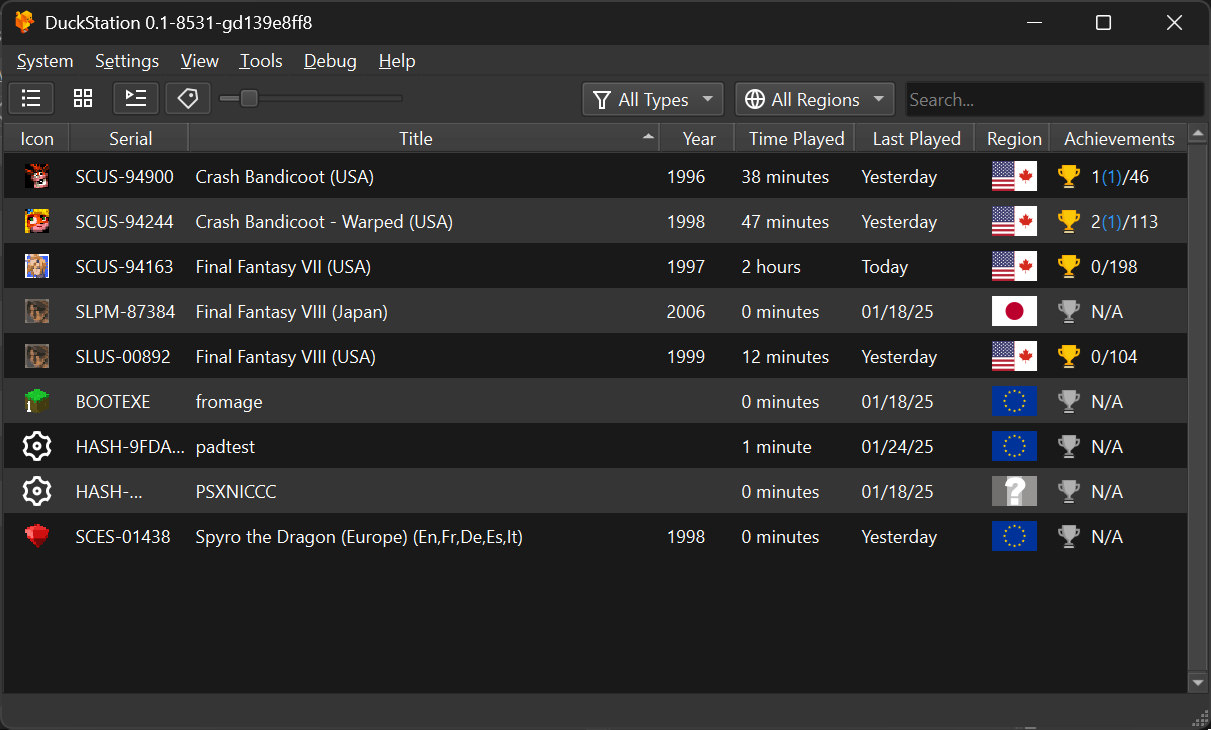
DuckStation features a fully-featured frontend built using Qt (pictured), as well as a simplified frontend based on SDL and Dear ImGui. An Android version has been started, but is not currently usable.
Other features include:
- CPU Recompiler/JIT (x86-64 and AArch64)
- Hardware (D3D11 and OpenGL) and software rendering
- Upscaling and true colour (24-bit) in hardware renderers
- "Fast boot" for skipping BIOS splash/intro
- Save state support
- Windows, Linux, highly experimental macOS support
- Supports bin/cue images, raw bin/img files, and MAME CHD formats.
- Direct booting of homebrew executables
- Direct loading of Portable Sound Format (psf) files
- Digital and analog controllers for input (rumble is forwarded to host)
- Qt and SDL frontends for desktop
- Automatic content scanning - game titles/regions are provided by redump.org
System Requirements
- A CPU faster than a potato.
- For the hardware renderers, a GPU capable of OpenGL 3.0/OpenGL ES 3.0/Direct3D 11 Feature Level 10.0 and above. So, basically anything made in the last 10 years or so.
- SDL-compatible game controller (e.g. XB360/XBOne)
Downloading and running
Prebuilt binaries of DuckStation for 64-bit Windows are available via AppVeyor CI. To download:
- Go to https://ci.appveyor.com/project/stenzek/duckstation
- Select "Image: Visual Studio 2019" from the Job list.
- Click on the "Artifacts" Tab.
- Download the "duckstation-win64-release.7z" artifact. This is a 7-Zip archive containing the prebuilt binary.
- Extract the archive to a subdirectory. The archive has no root subdirectory, so extracting to the current directory will drop a bunch of files in your download directory if you do not extract to a subdirectory.
Once downloaded and extracted, you can launch the Qt frontend from duckstation-qt-x64-ReleaseLTCG.exe, or the SDL frontend from duckstation-sdl-x64-ReleaseLTCG.exe.
To set up:
- Either configure the path to a BIOS image in the settings, or copy one or more PlayStation BIOS images to the bios/ subdirectory.
- If using the SDL frontend, add the directories containing your disc images by clicking
Settings->Add Game Directory. - Select a game from the list, or open a disc image file and enjoy.
Prebuilt AppImage binaries for 64-bit Linux distros are also available via AppVeyor CI, but should not be considered fully supported at the moment. Linux users are encouraged to build from source when possible.
PlayStation game discs do not contain title information. For game titles, we use the redump.org database cross-referenced with the game's executable code.
This database can be manually downloaded and added as cache/redump.dat, or automatically downloaded by going into the Game List Settings in the Qt Frontend,
and clicking Update Redump Database.
Region detection and BIOS images
By default, DuckStation will emulate the region check present in the CD-ROM controller of the console. This means that when the region of the console does not match the disc, it will refuse to boot, giving a "Please insert PlayStation CD-ROM" message. DuckStation supports automatic detection disc regions, and if you set the console region to auto-detect as well, this should never be a problem.
If you wish to use auto-detection, you do not need to change the BIOS path each time you switch regions. Simply place the BIOS images for the other regions in the same directory as the configured image. This will probably be in the bios/ subdirectory. Then set the console region to "Auto-Detect", and everything should work fine. The console/log will tell you if you are missing the image for the disc's region.
Some users have been confused by the "BIOS Path" option, the reason it is a path and not a directory is so that an unknown BIOS revision can be used/tested.
Alternatively, the region checking can be disabled in the console options tab. This is the only way to play unlicensed games or homebrew which does not supply a correct region string on the disc, aside from using fastboot which skips the check entirely.
Mismatching the disc and console regions with the check disabled is supported, but may break games if they are patching the BIOS and expecting specific content.
Building
Windows
Requirements:
- Visual Studio 2019
- Clone the respository with submodules (
git clone --recursiveorgit cloneandgit submodule update --init). - Open the Visual Studio solution
duckstation.slnin the root, or "Open Folder" for cmake build. - Build solution.
- Binaries are located in
bin/x64. - Run
duckstation-sdl-x64-Release.exe/duckstation-qt-x64-Release.exeor whichever config you used.
Linux
Requirements (Debian/Ubuntu package names):
- CMake (
cmake) - SDL2 (
libsdl2-dev) - GTK2.0 for file selector (
libgtk2.0-dev) - Qt 5 (
qtbase5-dev,qtbase5-dev-tools) - Optional for faster building: Ninja (
ninja-build)
- Clone the repository. Submodules aren't necessary, there is only one and it is only used for Windows.
- Create a build directory, either in-tree or elsewhere.
- Run cmake to configure the build system. Assuming a build subdirectory of
build-release,cd build-release && cmake -DCMAKE_BUILD_TYPE=Release -GNinja ... - Compile the source code. For the example above, run
ninja. - Run the binary, located in the build directory under
src/duckstation-sdl/duckstation-sdl, orsrc/duckstation-qt/duckstation-qt.
macOS
NOTE: macOS is highly experimental and not tested by the developer. Use at your own risk, things may be horribly broken.
Requirements:
- CMake (installed by default? otherwise,
brew install cmake) - SDL2 (
brew install sdl2) - Qt 5 (
brew install qt5)
- Clone the repository. Submodules aren't necessary, there is only one and it is only used for Windows.
- Create a build directory, either in-tree or elsewhere, e.g.
mkdir build-release,cd build-release. - Run cmake to configure the build system:
cmake -DCMAKE_BUILD_TYPE=Release -DQt5_DIR=/usr/local/opt/qt/lib/cmake/Qt5 ... You may need to tweakQt5_DIRdepending on your system. - Compile the source code:
make. Usemake -jNwhereNis the number of CPU cores in your system for a faster build. - Run the binary, located in the build directory under
src/duckstation-sdl/duckstation-sdl, orsrc/duckstation-qt/duckstation-qt.
Application bundles/.apps are currently not created, so you can't launch it via Finder yet. This is planned for the future.
Android
NOTE: The Android frontend is still incomplete, not all functionality works and some paths are hard-coded. The Android app is currently broken and fixing it is not a priority. However, this will change in the future.
Requirements:
- Android Studio with the NDK and CMake installed
- Clone the repository. Submodules aren't necessary, there is only one and it is only used for Windows.
- Open the project in the
androiddirectory. - Select Build -> Build Bundle(s) / APKs(s) -> Build APK(s).
- Install APK on device, or use Run menu for attached device.
User Directories
The "User Directory" is where you should place your BIOS images, where settings are saved to, and memory cards/save states are saved by default.
This is located in the following places depending on the platform you're using:
- Windows: Directory containing DuckStation executable.
- Linux:
$XDG_DATA_HOME/duckstation, or~/.local/share/duckstation. - macOS:
~/Library/Application Support/DuckStation.
So, if you were using Linux, you would place your BIOS images in ~/.local/share/duckstation/bios. This directory will be created upon running DuckStation
for the first time.
If you wish to use a "portable" build, where the user directory is the same as where the executable is located, create an empty file named portable.txt
in the same directory as the DuckStation executable.
Bindings for Qt frontend
Your keyboard and any SDL-compatible game controller can be used to simulate the PS Controller. To bind keys/controllers to buttons, go to
Settings -> Port Settings. Each of the buttons will be listed, along with the corresponding key it is bound to. To re-bind the button to a new key,
click the button next to button name, and press the key/button you want to use within 5 seconds.
Currently, it is only possible to bind one input to each controller button/axis. Multiple bindings per button are planned for the future.
Bindings for SDL frontend
Keyboard bindings in the SDL frontend are currently not customizable in the frontend itself. You should use the Qt frontend to set up your key/controller bindings first.
Default bindings
Controller 1:
- D-Pad: W/A/S/D
- Triangle/Square/Circle/Cross: Numpad8/Numpad4/Numpad6/Numpad2
- L1/R1: Q/E
- L2/L2: 1/3
- Start: Enter
- Select: Backspace
Hotkeys:
- Escape: Power off console
- ALT+ENTER: Toggle fullscreen
- Tab: Temporarily disable speed limiter
- Pause/Break: Pause/resume emulation
- Page Up/Down: Increase/decrease resolution scale in hardware renderers
- End: Toggle software renderer
Tests
- Passes amidog's CPU and GTE tests in both interpreter and recompiler modes, partial passing of CPX tests
Screenshots


Disclaimers
Icon by icons8: https://icons8.com/icon/74847/platforms.undefined.short-title
"PlayStation" and "PSX" are registered trademarks of Sony Interactive Entertainment Europe Limited. This project is not affiliated in any way with Sony Interactive Entertainment.